I’ve spent hundreds of hours untangling logistics nightmares in factory games. You know the ones where your entire production line stops because one resource isn’t moving fast enough.
You’re here because you’re tired of guessing how many trucks or trains you need. Your factories keep stalling and you can’t figure out why your supply chains fall apart.
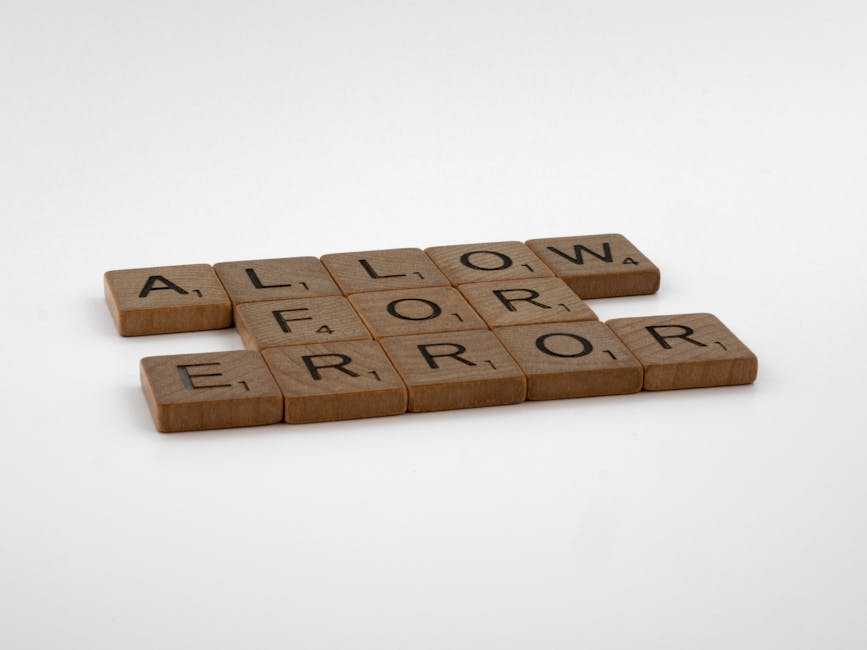
Here’s the thing: most players eyeball their transportation needs. That’s why their factories fail.
This guide shows you how to build a calculation tool that tells you exactly what you need. No more bottlenecks. No more production lines grinding to a halt because you didn’t move enough iron plates.
I’ve optimized virtual production lines in every major factory sim out there. The framework I’m sharing comes from actually solving these problems, not theorizing about them.
tportulator focuses on giving you practical tools that work in real gameplay situations.
You’ll get the exact steps and variables you need to calculate your transportation requirements. We’re talking about a method that accounts for production rates, distance, and consumption so your resources actually get where they need to go.
No fluff. Just the math that makes your factories run.
Why Your In-Game Factory is Failing: The High Cost of ‘Good Enough’
You know that moment when your factory just stops working.
Everything was fine an hour ago. Now half your assemblers sit idle while the other half overflow with materials nobody needs.
The ‘eyeballing’ trap got you.
I see this all the time. You’re cruising through early game and figure you can just slap down another belt when things slow down. Add a few more trucks. Maybe another miner or two.
It works. For a while.
Then your factory hits a certain size and the whole thing falls apart. You’re spending more time fixing problems than actually building anything new.
Here’s what’s actually happening.
Your logistics can’t keep up. You built for what you needed yesterday, not what you need today.
The symptoms are pretty obvious once you know what to look for:
- Assemblers sitting empty waiting for materials that never arrive
- Storage containers backed up because nothing’s moving the output
- Miners running full speed but their products stuck on belts going nowhere
(The Tportulator console guide by theportablegamer covers some of these bottleneck patterns if you want to dig deeper.)
But here’s the real problem.
One miscalculation ripples through everything. You underestimate iron plate demand by 20%. Now your green circuit production drops. Which means your red circuits slow down. Which stalls your blue science. Which kills your research speed.
Three hours later you’re still trying to figure out where it all went wrong.
That’s the high cost of good enough. It’s not just inefficiency. It’s wasted time rebuilding what you should’ve planned correctly the first time.
The Core Components of a Transportation Calculator
You know that feeling when your factory grinds to a halt because one belt can’t keep up?
Yeah. We’ve all been there.
I’ve watched players build these massive production chains only to have everything bottleneck at the worst possible moment. Usually right before a big milestone (or when you’re showing off to friends).
The fix isn’t complicated. You just need to understand what numbers actually matter.
Some people will tell you that transportation planning is overkill. They say you should just eyeball it and add more belts when things slow down. That you’re overthinking a game that’s supposed to be fun.
And sure, that works. Until you’re three hours into debugging why your green circuit production is starving your red circuit assemblers.
Here’s what I’ve learned. You don’t need to be a math genius. But you do need three core numbers.
Variable 1: Production Rate (Items/Minute)
This is where everything starts. How many items are your miners spitting out? What’s coming off your smelter lines?
Check your machine tooltips. Most games show you the exact output rate. Write it down or keep a tportulator reference handy.
That’s your baseline.
Variable 2: Consumption Rate (Items/Minute)
Now flip it around. How much do your destination machines need to run at full speed?
If your assemblers need 30 iron plates per minute to stay busy, that’s your target number. Nothing more, nothing less.
Variable 3: Transport Capacity & Speed
This is where it gets real. Every transport method has limits.
Conveyor belts move a set number of items per second. Yellow belts in Factorio cap out at 15 items per second. Red belts hit 30. Blue belts max at 45.
Trains are different. You’re looking at wagon inventory size plus the time it takes to load, travel, and unload. A train sitting at a station isn’t moving resources. To gain a deeper understanding of how trains impact resource management in the game, be sure to visit our for detailed strategies and insights.
Drones and bots? Same deal. Check their carry capacity and how long each trip takes.
(It’s like that scene in The Italian Job where they time everything down to the second. Except your heist is iron ore.)
The Master Formula
Here’s the simple truth: Required Throughput = Consumption Rate.
Your transport capacity needs to meet or beat that number. If your machines consume 45 items per minute, your belt better deliver at least 45 items per minute.
Fall short and you’re watching assemblers sit idle. Overshoot and you’re just wasting resources on bigger infrastructure than you need.
That’s it. Three variables and one formula. Get these right and your factory runs smooth.
Practical Application: Calculating for Conveyor Belts
Let me walk you through this because once you get it, factory planning becomes way easier.
Step 1: Define Your Goal
Say you’re feeding 8 assemblers. Each one needs 30 iron plates per minute.
Step 2: Calculate Total Demand
Simple math here. 8 assemblers * 30 plates/min = 240 plates/min.
Step 3: Convert to Items/Second
This is where most people get confused (but it’s actually the easiest part). Take your total and divide by 60. 240 plates/min / 60 seconds = 4 plates/sec.
Step 4: Match to Your Tool
Now compare that 4 items/sec to what your belts can actually handle. If your basic belt moves 15 items/sec, you’re golden. One belt does the job.
But if it only moves 2 items/sec? You need at least two full belts running parallel.
Here’s my take on this. Most players skip the math and just slap down belts until things work. I used to do the same thing. But you end up with spaghetti factories that break the moment you scale up.
The calculation takes 30 seconds. The headache of rebuilding everything later takes hours.
Pro Tip: This same method works for building perfect production ratios. Once you know one belt of iron ore produces X plates per second, you can figure out exactly how many copper belts you need. At tportulator, we see players waste tons of resources because they eyeball ratios instead of doing quick math first.
Run the numbers once and your factory runs smooth forever.
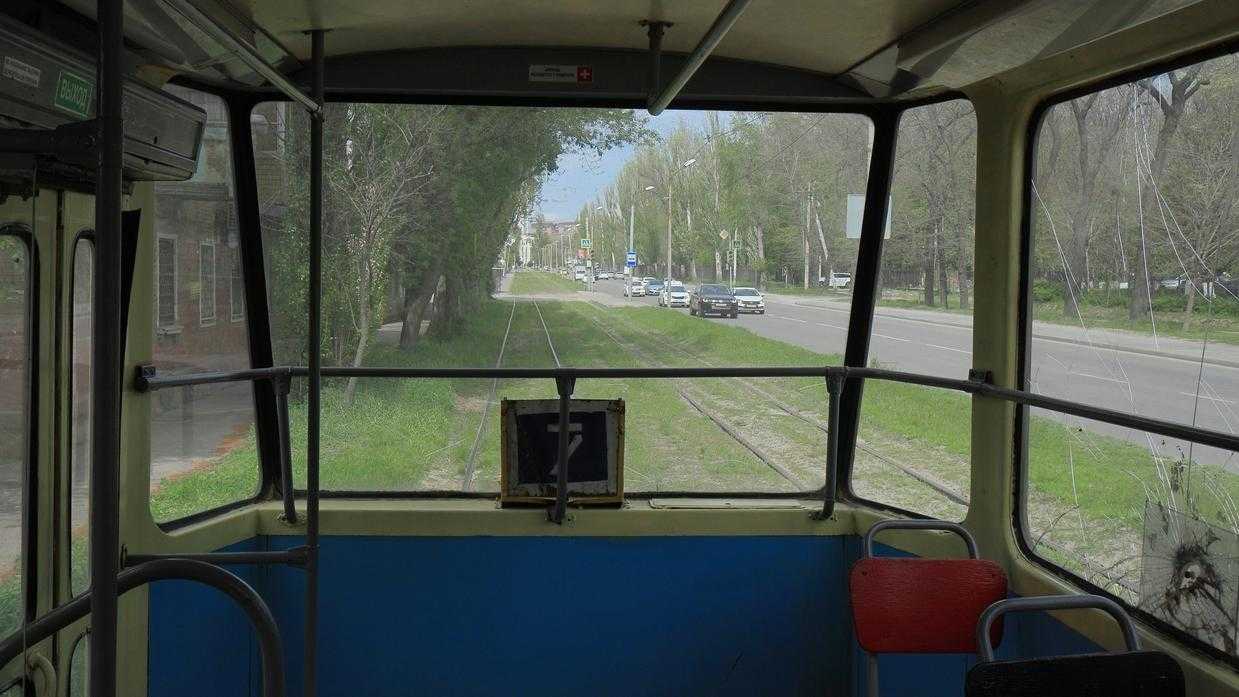
Advanced Logistics: Calculating for Trains and Drones
You’ve mastered belts. Your factory hums along nicely.
Then you hit that wall. Your iron patches are 2000 tiles away and suddenly belts feel like watching paint dry.
Time to talk trains.
Calculating train throughput is trickier than belts. You need to factor in the full trip cycle, not just speed.
Here’s the formula: (Wagon Capacity * Number of Wagons) / Total Trip Time.
Simple enough, right? But that Total Trip Time catches people off guard.
You need to measure everything. The actual travel time between stations. Loading time (watch those inserter animations). Unloading time. Even the few seconds it takes for your train to accelerate and brake.
I use a stopwatch. Start it when the train leaves the loading station and stop it when it’s ready to leave again. Do this three times and average it out.
Most players forget about the loading animations and wonder why their calculations are off.
So when do you actually switch from belts to trains?
Run the numbers in tportulator. Compare your belt throughput against your train capacity. For most setups, trains win once you’re hauling resources more than 500 tiles.
But here’s what you’re probably wondering next. What about drones?
Drones work differently. They’re network-based, which means you’re not calculating a single route. You’re calculating total network capacity against everything demanding resources in that zone.
The formula looks familiar: (Number of Drones * Carry Capacity) / Average Trip Time.
The difference? Your drones serve multiple requests. One drone might fly to three different spots before returning to charge. So your average trip time needs to account for the whole network, not just point A to point B. In navigating the complexities of drone management across multiple delivery points, players will find invaluable insights in the Tportulator Console Guide by Theportablegamer, which expertly outlines strategies to optimize average trip times within the network.
Here’s the thing nobody tells you. Drones aren’t always better than trains. They’re better for flexibility and complex routing. But for raw throughput on a single route? Trains still win.
From Chaotic Factory to Optimized Machine
You now know how to build a transportation calculation tool for any resource management game.
No more guessing how many belts or trains you need. No more watching your factory grind to a halt because iron plates aren’t reaching your assemblers fast enough.
I’ve seen players spend hours troubleshooting production lines when the real problem was simple math they never did.
This systematic approach changes everything. You stop reacting to bottlenecks and start preventing them before they happen.
The difference between a struggling factory and a smooth operation comes down to understanding your numbers. Once you see how throughput actually works, you can plan instead of panic.
Here’s what you do next: Open your game and pick one production line that’s been giving you trouble. Run these calculations on it. Watch what happens when you match your transportation to your actual needs.
The math doesn’t lie. Your belts either move enough resources or they don’t.
Load up your save file and test this on a single chain first. You’ll see the difference immediately.
tportulator exists to help you play smarter, not harder. This is how you turn chaos into precision. Gaming Console News Tportulator. Console Gaming Updates Tportulator.
 Lorvina Talvessa is the kind of writer who genuinely cannot publish something without checking it twice. Maybe three times. They came to game strategy guides through years of hands-on work rather than theory, which means the things they writes about — Game Strategy Guides, Gaming News and Updates, Player Insights and Reviews, among other areas — are things they has actually tested, questioned, and revised opinions on more than once.
That shows in the work. Lorvina's pieces tend to go a level deeper than most. Not in a way that becomes unreadable, but in a way that makes you realize you'd been missing something important. They has a habit of finding the detail that everybody else glosses over and making it the center of the story — which sounds simple, but takes a rare combination of curiosity and patience to pull off consistently. The writing never feels rushed. It feels like someone who sat with the subject long enough to actually understand it.
Outside of specific topics, what Lorvina cares about most is whether the reader walks away with something useful. Not impressed. Not entertained. Useful. That's a harder bar to clear than it sounds, and they clears it more often than not — which is why readers tend to remember Lorvina's articles long after they've forgotten the headline.
Lorvina Talvessa is the kind of writer who genuinely cannot publish something without checking it twice. Maybe three times. They came to game strategy guides through years of hands-on work rather than theory, which means the things they writes about — Game Strategy Guides, Gaming News and Updates, Player Insights and Reviews, among other areas — are things they has actually tested, questioned, and revised opinions on more than once.
That shows in the work. Lorvina's pieces tend to go a level deeper than most. Not in a way that becomes unreadable, but in a way that makes you realize you'd been missing something important. They has a habit of finding the detail that everybody else glosses over and making it the center of the story — which sounds simple, but takes a rare combination of curiosity and patience to pull off consistently. The writing never feels rushed. It feels like someone who sat with the subject long enough to actually understand it.
Outside of specific topics, what Lorvina cares about most is whether the reader walks away with something useful. Not impressed. Not entertained. Useful. That's a harder bar to clear than it sounds, and they clears it more often than not — which is why readers tend to remember Lorvina's articles long after they've forgotten the headline.